Through this article I will go through the steps to create articles within this site. These articles are to be used by volunteers and others serving within the church.
What and Why
Let’s talk about why we’re creating articles and pushing volunteers to use this site for training and resources!
Equipping volunteers while saving departments time.
These articles are to be stored and accessible training resources for volunteers. As your department has new folks volunteering it can take a lot of time and team resources to train them prior to serving in your department. Think through all the processes that you could have new volunteers learn from on this platform to save your team time. Repetition of basics can be draining, this will allow you to equip volunteers well before they even step a foot into the church to serve.
Remember who you’re creating for.
Through the process of creating articles both through typing up the content as well as visual content (videos, photos, illustrations) you primary goal is to be clearly understandable by volunteers of all kinds. Some people are visual learners and need to see examples of how tasks are done, while others can read a short paragraph and have a clear understanding of how to do tasks.
Time now saves time later.
These articles will take some time to produce and write. We understand this could be a large burden on your team for an amount of time but after you’ve created it you’re set for the future and will only need to make edits as things change. It is worth the time to do it well now so that you don’t have to take time later!
Guidelines
Here are our guidelines for creating effective training articles:
- Details. These shouldn’t be textbooks but step-by-step is helpful for most learners. Think about the fact that people will read this article with zero context to any of the information. They’re here to learn something new.
- Voice. Through these articles remember that the readers are human and don’t always think as technical or creative as you might. You’re having a conversation with a person just as if you were training them face to face.
- Photos. Use images of equipment, locations, anything that will help a person see exactly what you’re referencing.
- Video. A video can be created to go over all the content in the articles as well as being a great way to show examples of what that article is training someone for.
- Our Values. This a is a great opportunity to be sharing why we do the things we do as a church. Sharing our values throughout will help people understand the importance of serving.
- Terms. Be sure to clarify language or words used commonly in your department that someone new may not understand the context.
Creating an Article
Alright here we go. First you’ll sign into the site with the provided credentials sent via email. Once there you’ll meet this dashboard screen.
Click here for the sign-in page.
Starting and Basic Editing
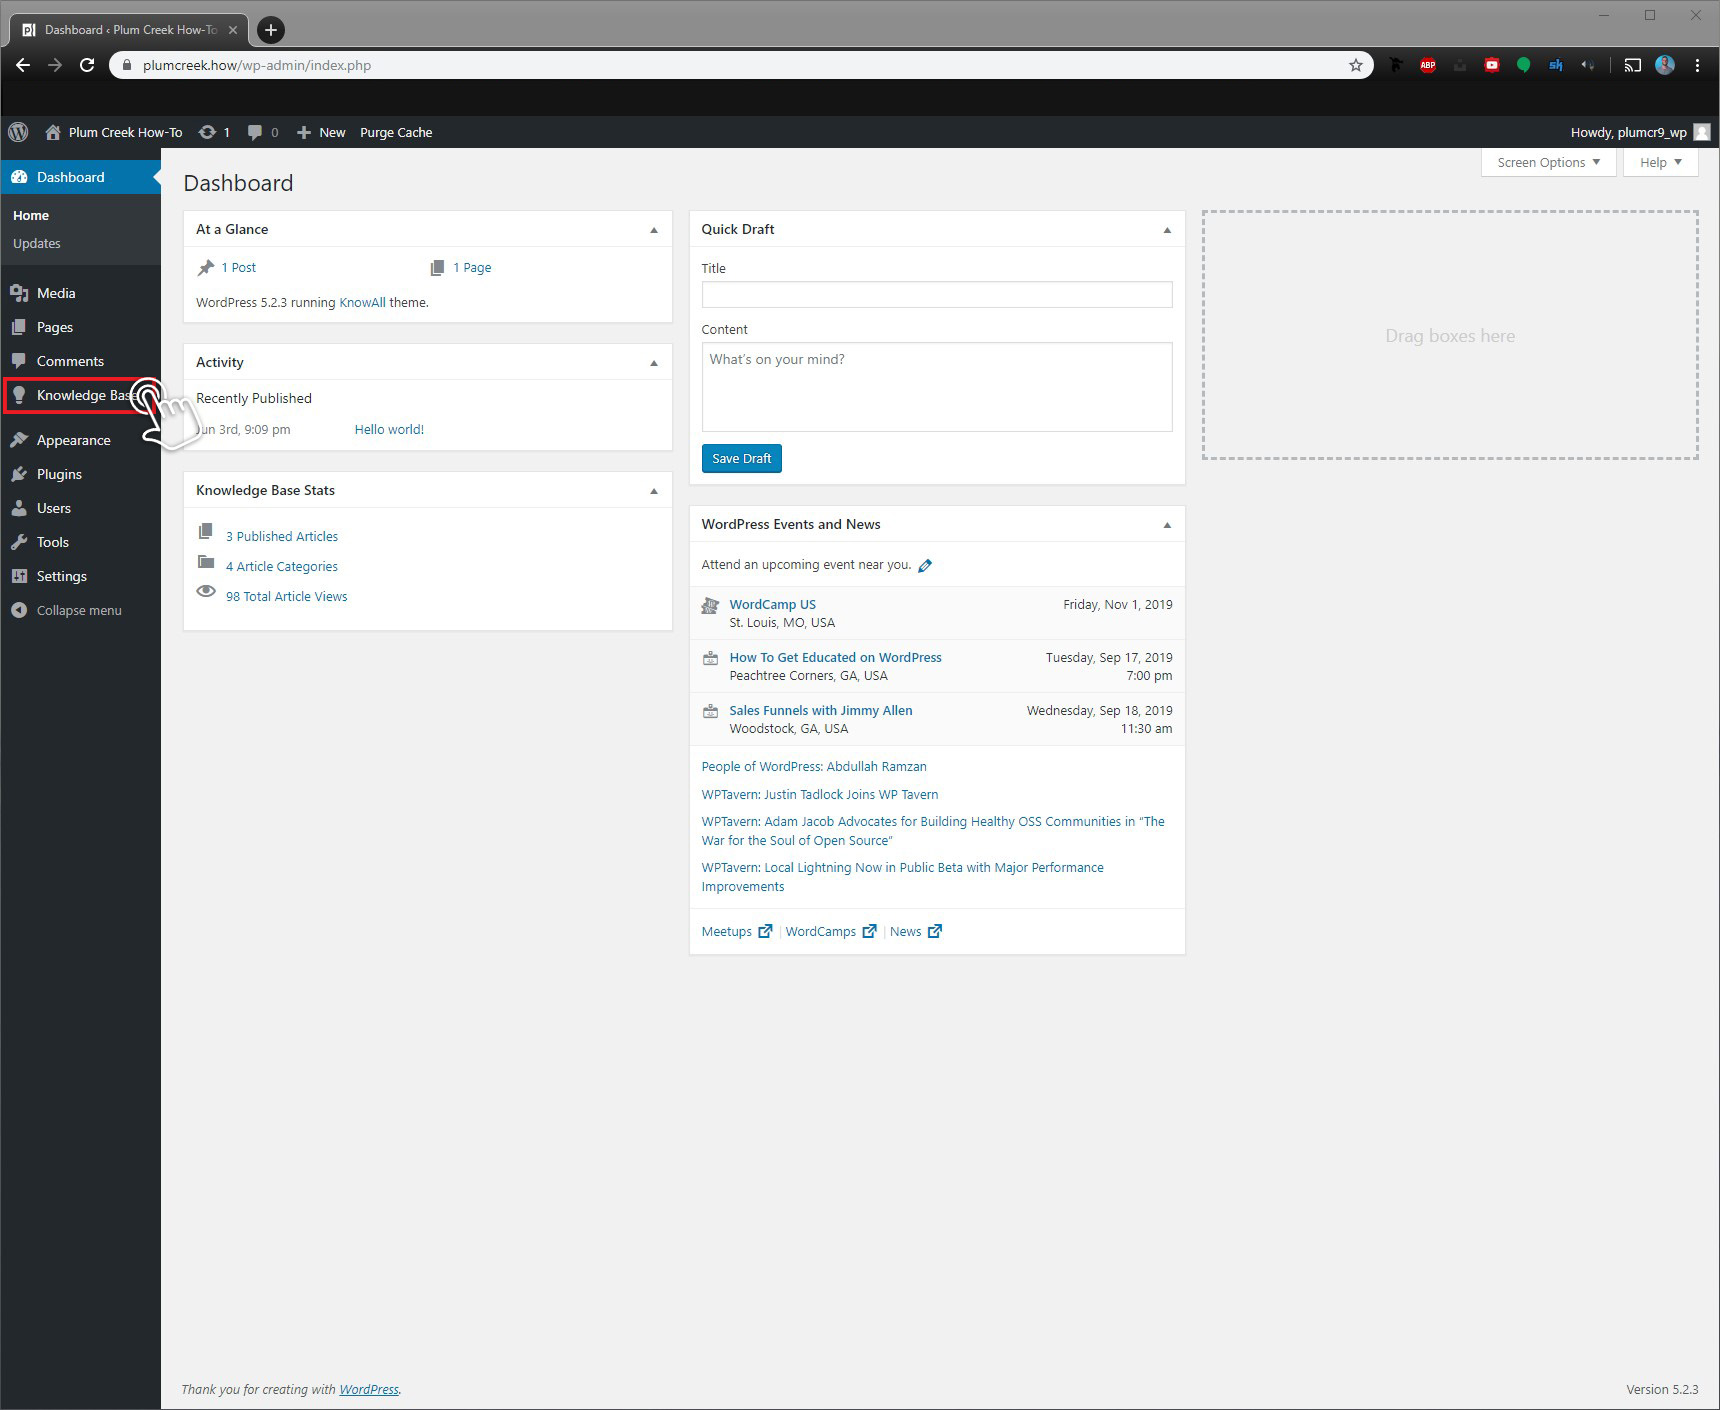 Dashboard screen, choose Knowledge Base
Next we Select the menu item “Knowledge Base” to open up our article options. From the new page we will select “Add New Article” near the top.
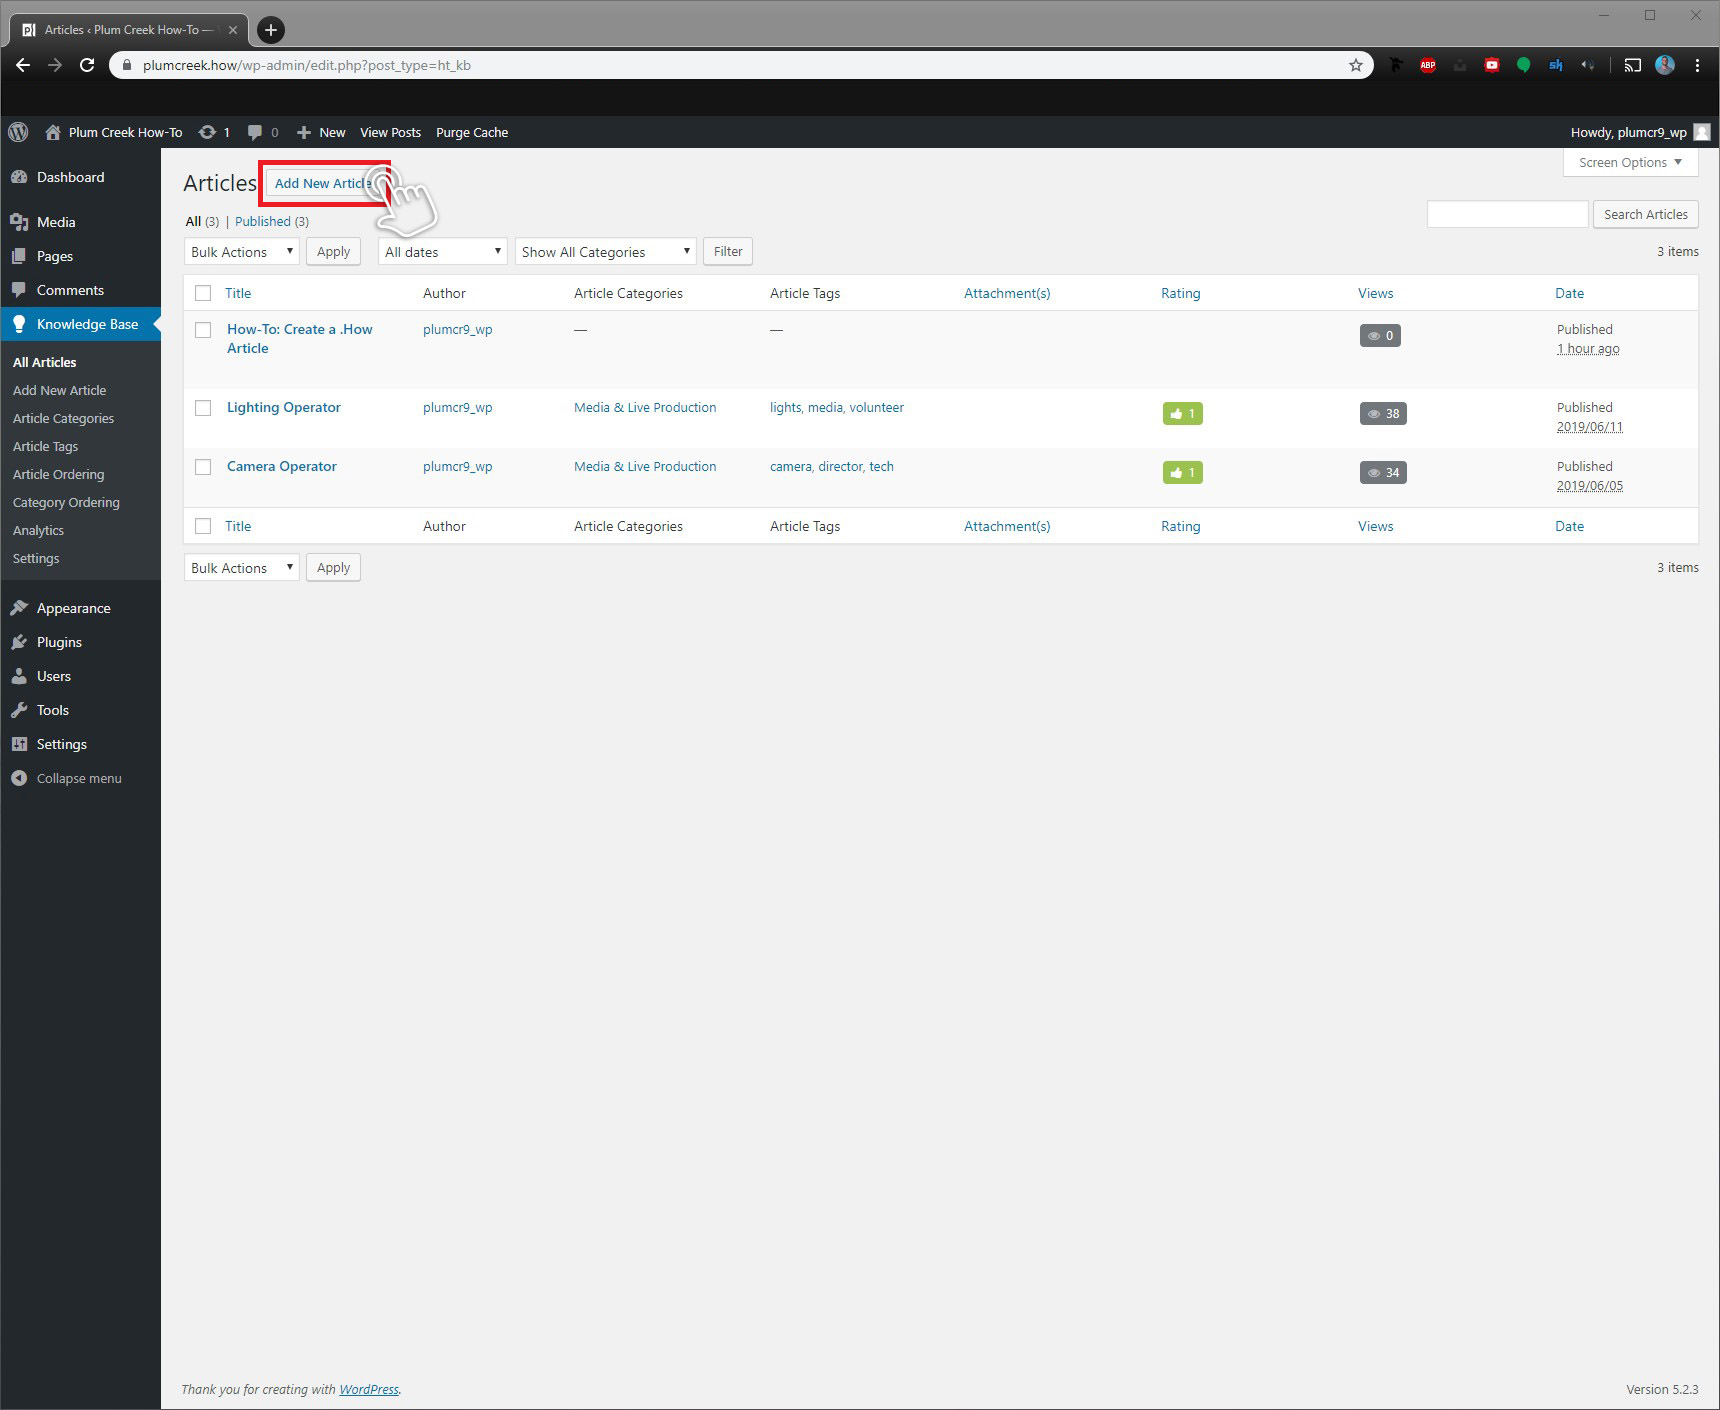 Choose “Add New Article”
This will bring you to the article interface where we will fill with content! You’ll be spending a lot of time in here so be sure to take some time to explore and become familiar. You should also select the Gearbox in the upper right to open options that will be used while creating article.
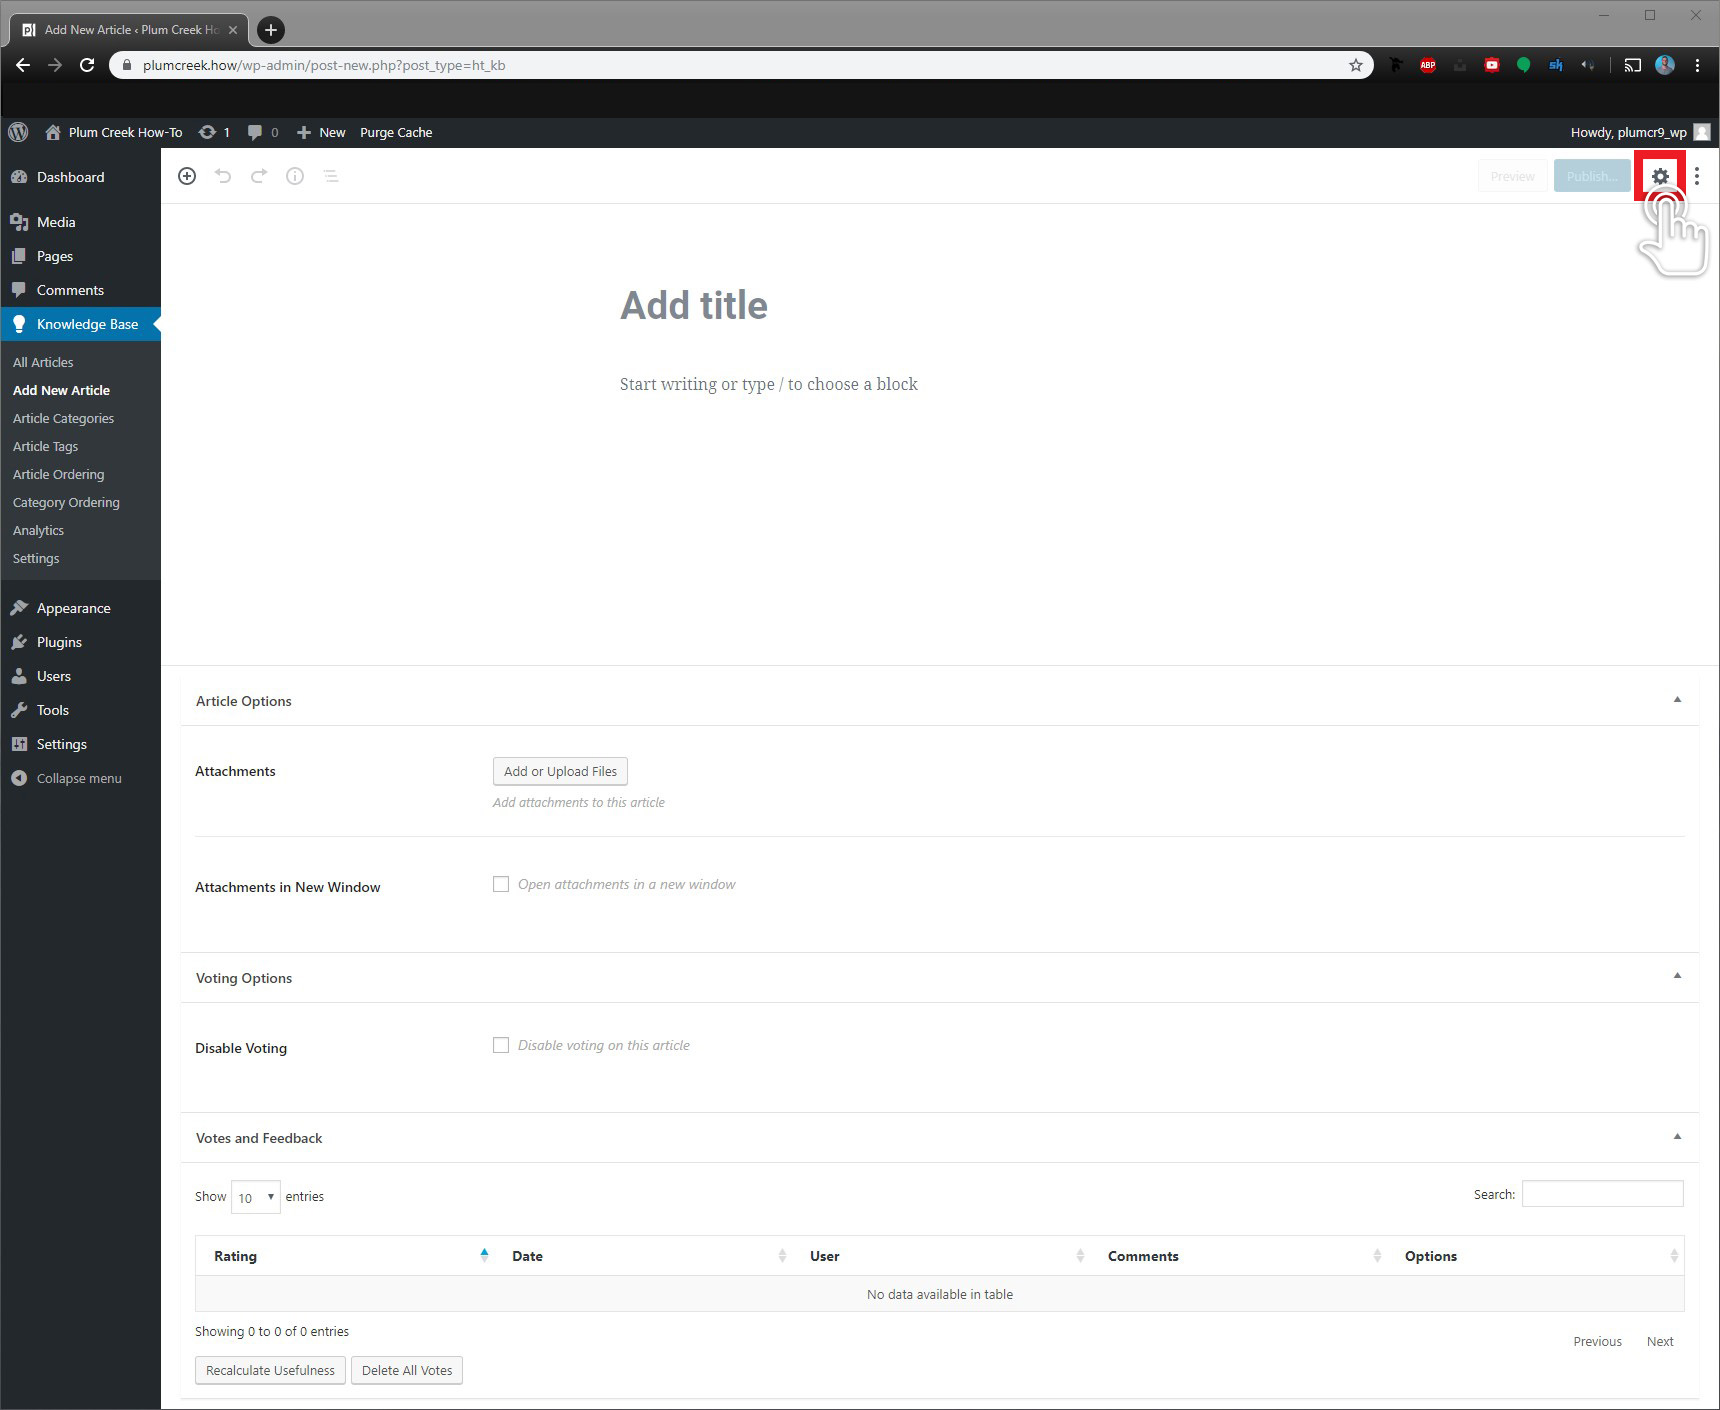 Select the gearbox for more options.
Once you’ve brought up the options you’ll be able to add the article to the category you’re making articles for. This is where the article will be included on the website for volunteers to find easily. While editing the article you’ll see additional options here depending on the content you’re editing. Text will show addition options for formatting, as images will give different options.
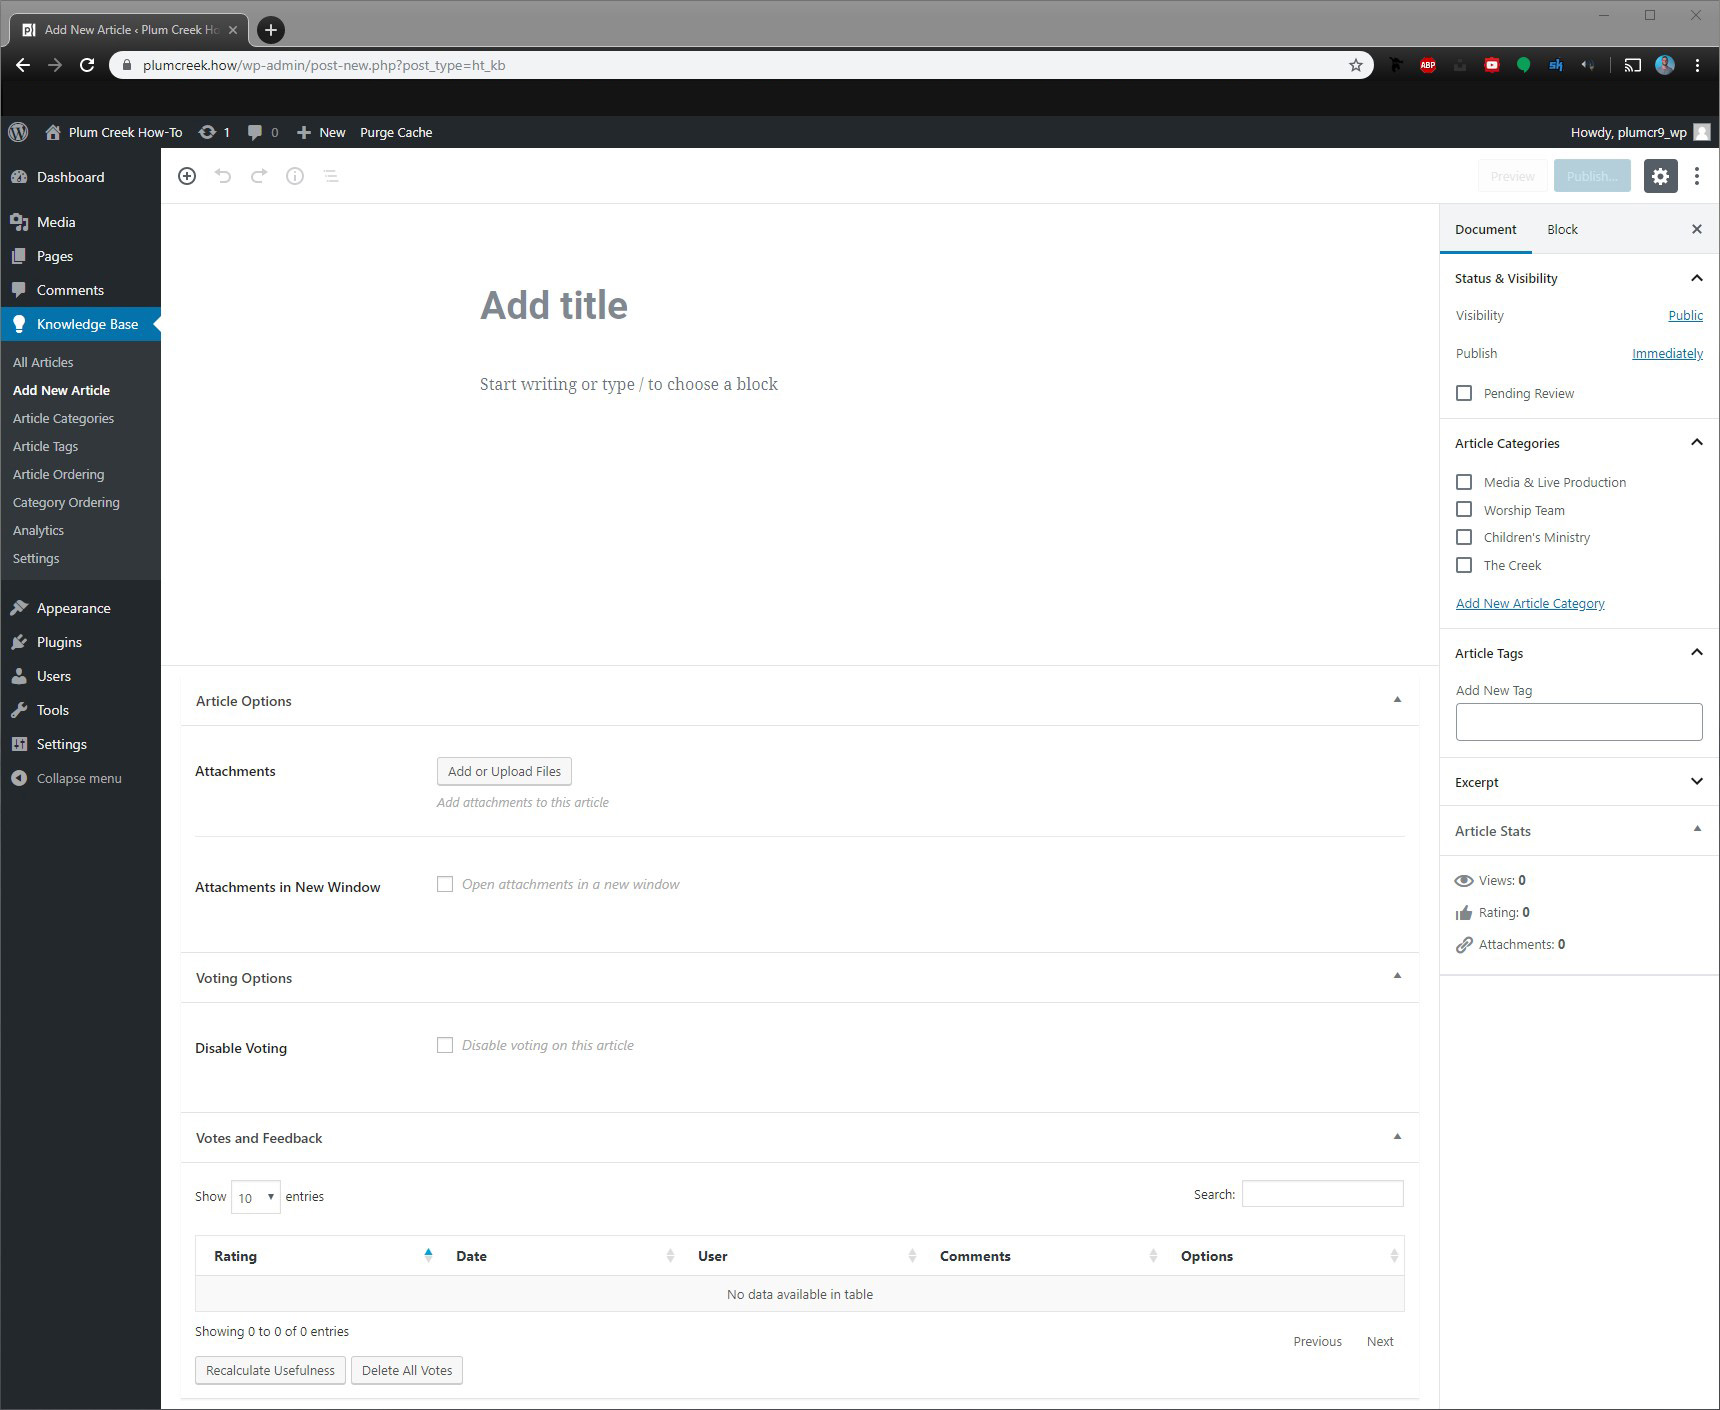 Example of options menu.
As most of the article will be text, we want to make sure that it’s being formatted well and in an order that makes sense. Be sure to group content that’s relevant to each other in each section, don’t jump around as that can be confusing. Using Headings to create these “groups” will be beneficial. H2’s will be the largest text but also group the next H3’s, H4’s, H5’s under it. Let me show you what I mean by this:
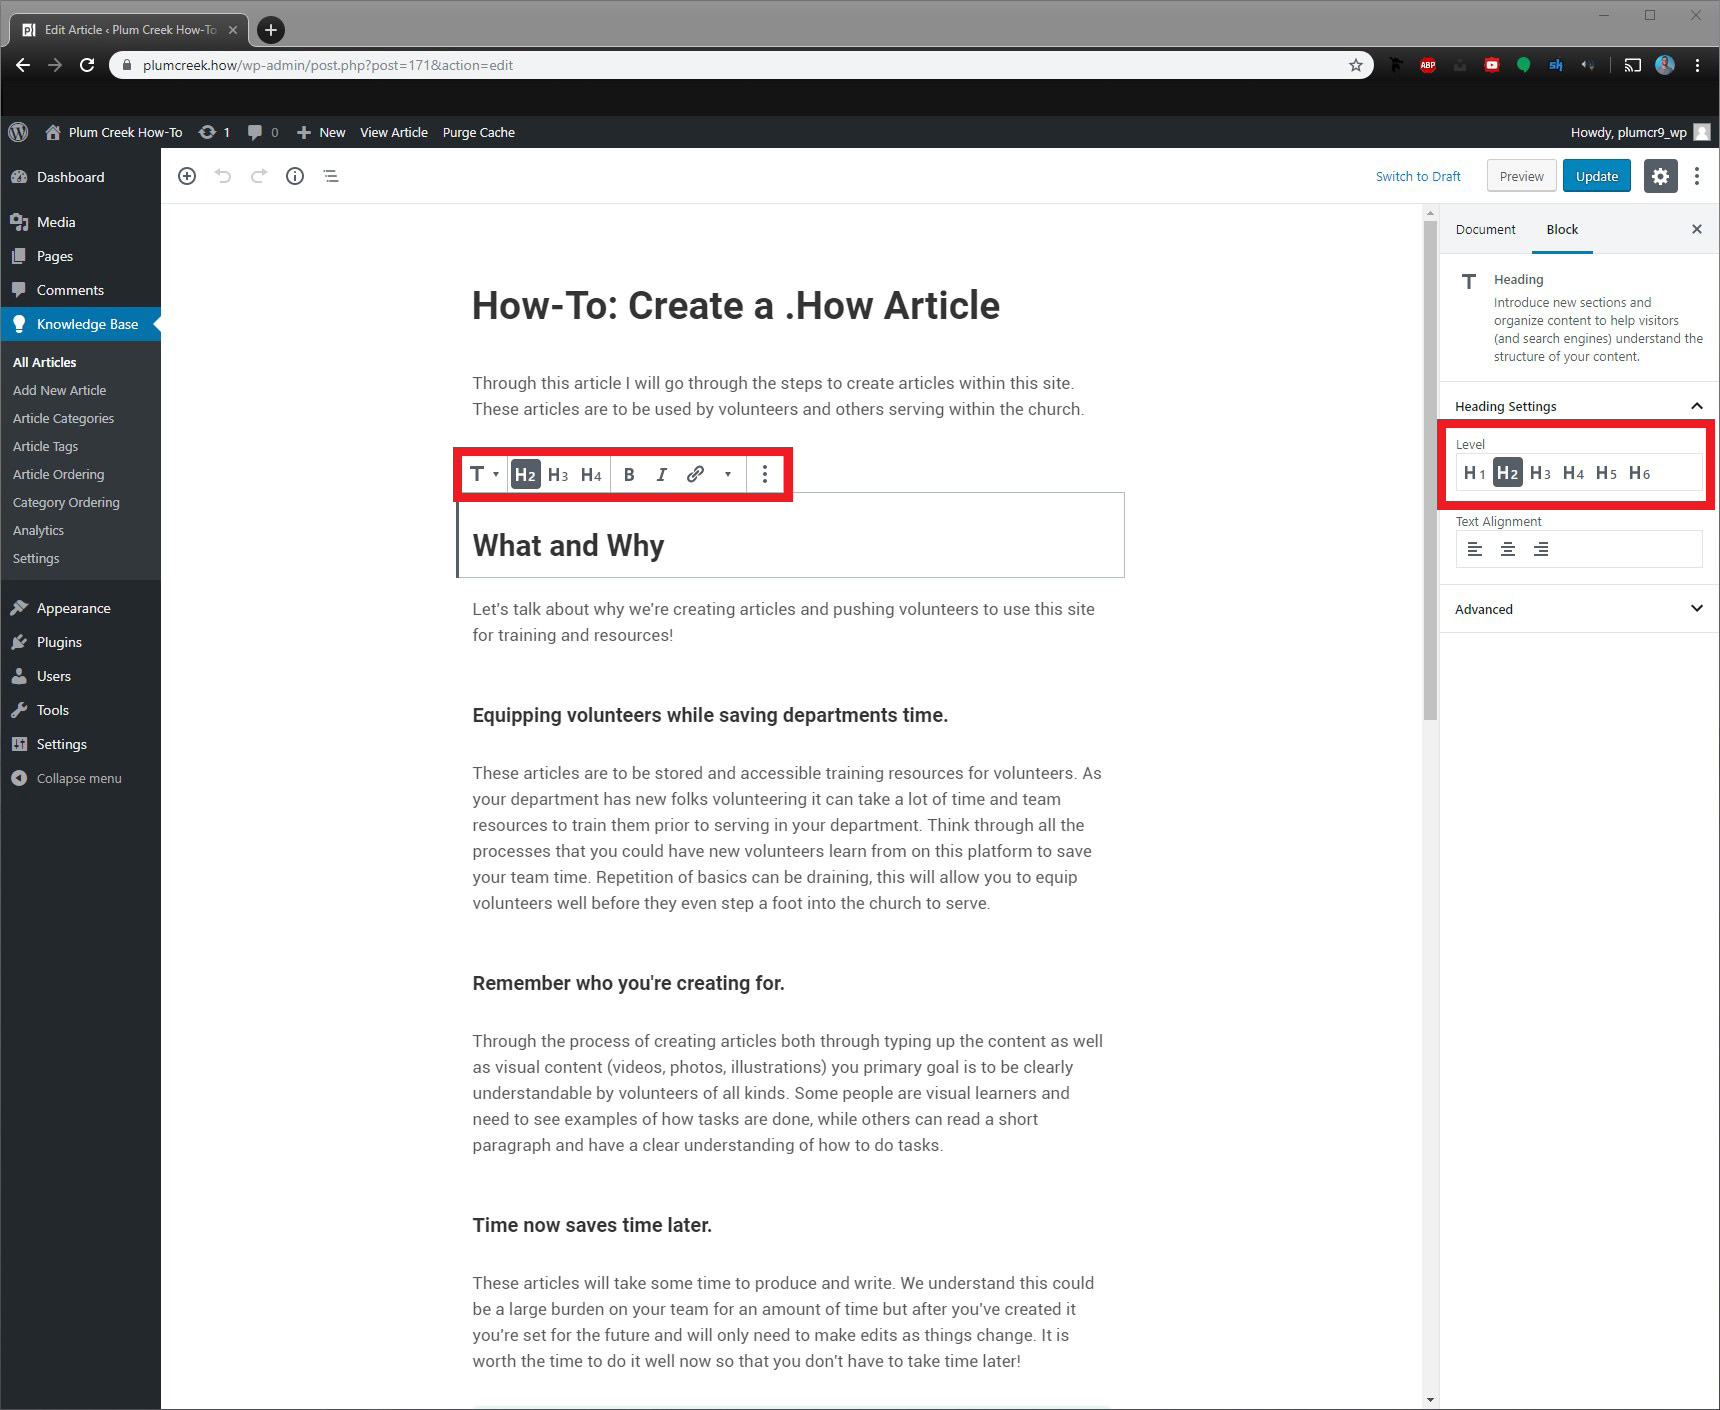 Using headings properly.
With each heading comes the benefit of making the article easier to read and navigate. So while it changes the font size to show importance it also has an affect on the volunteer’s view of the article. Each heading creates items within a list on the live website. Think of each higher number as an indentation on a list. Here’s what I mean by that:
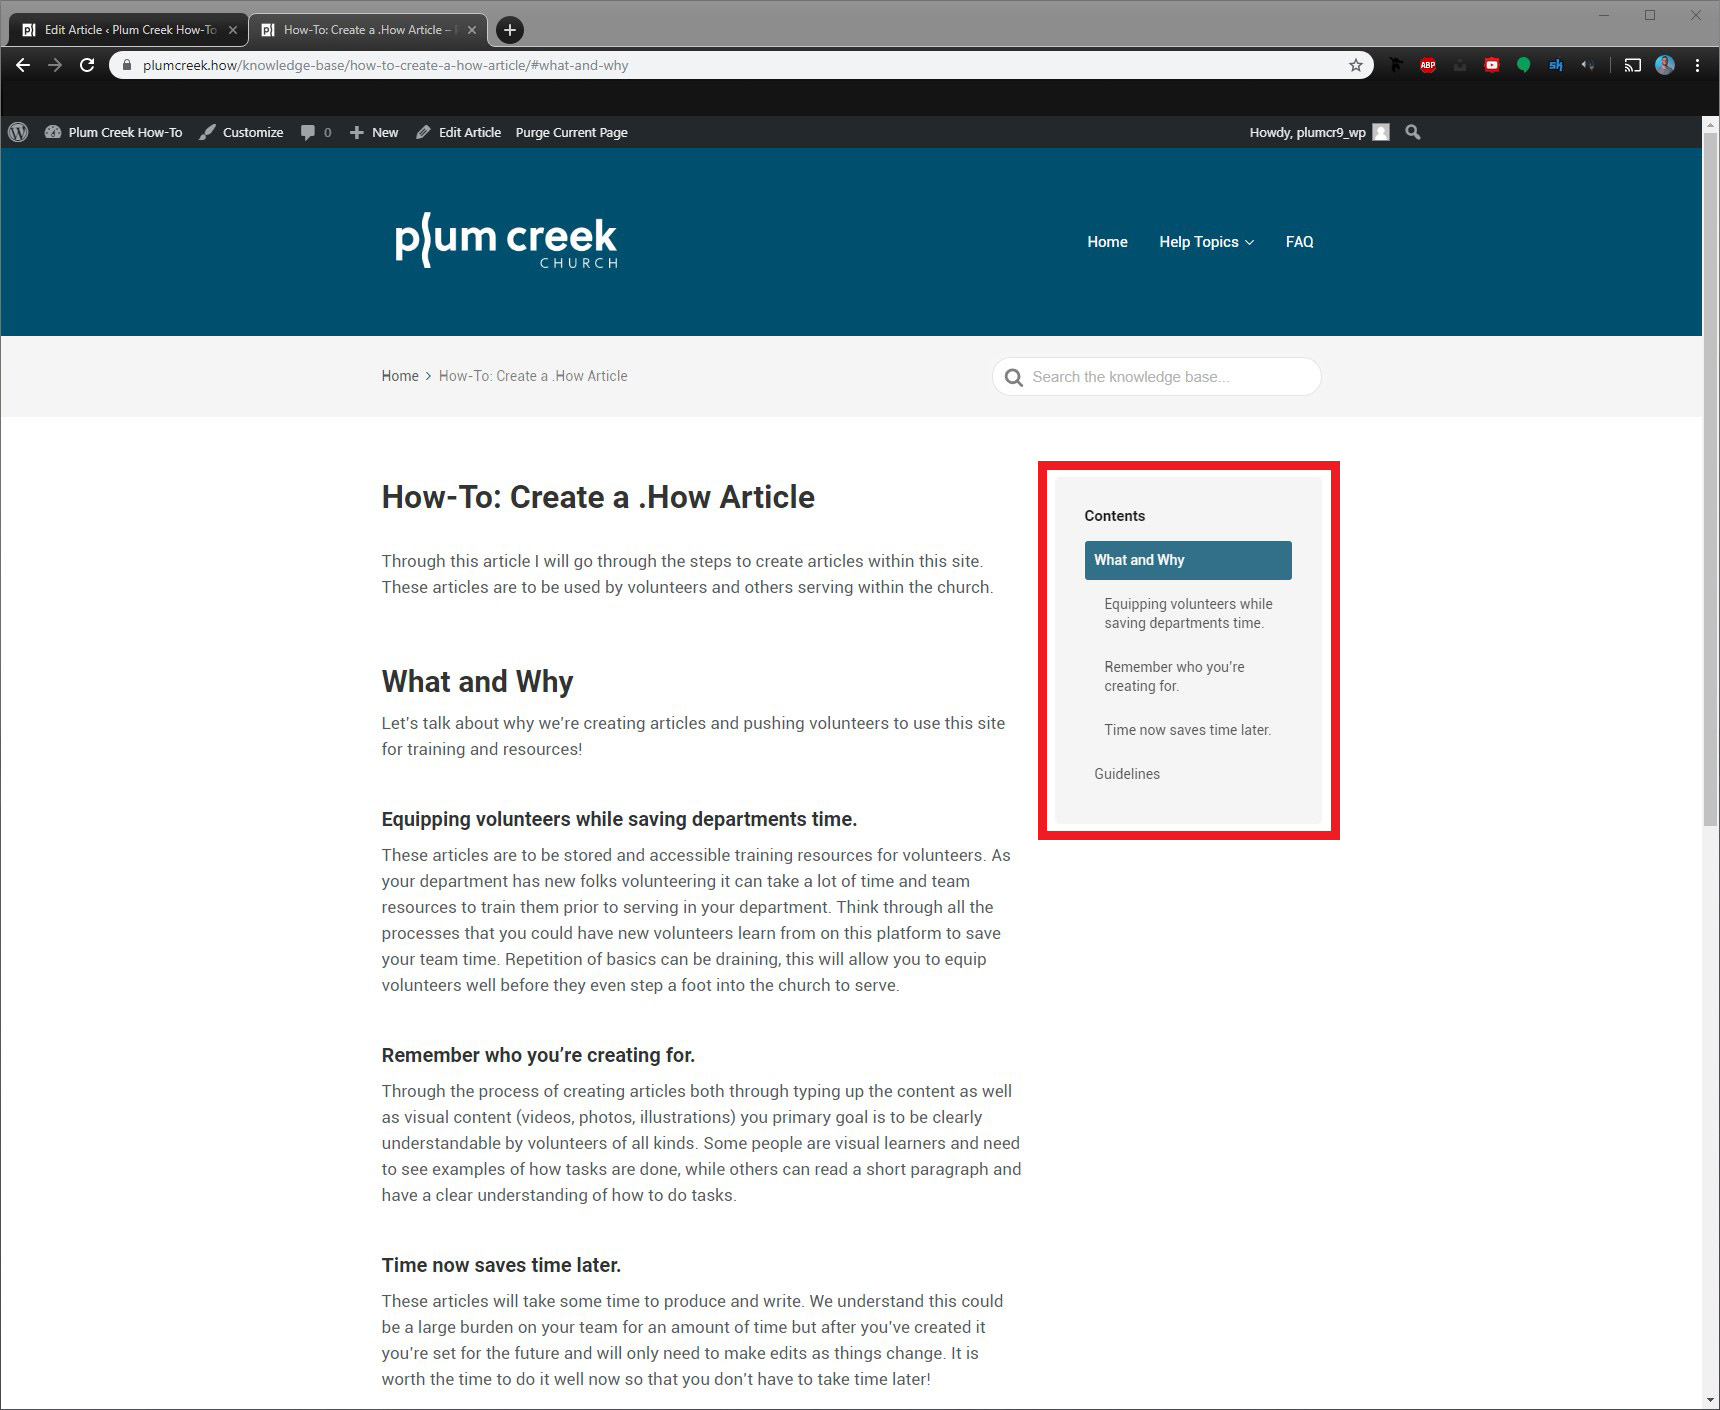 Example of headings and how they work on the site.
So we can see here that the headings cause the article to show sections that a volunteer can click on to jump to a specific part of the article. Maybe they’ve been through the article before and just need to freshen up on one portion of the article, this will make it easy to find. Do your best to create these in a helpful manner and logical flow.
Widgets
You can add a variety of specialty formatting options to your article depending on the type of information you’re trying to share. Feel free to explore with these widgets and see what will work for you. Generally we will only use the Heading, Paragraph, Image, Video, and heroic block messages widgets.
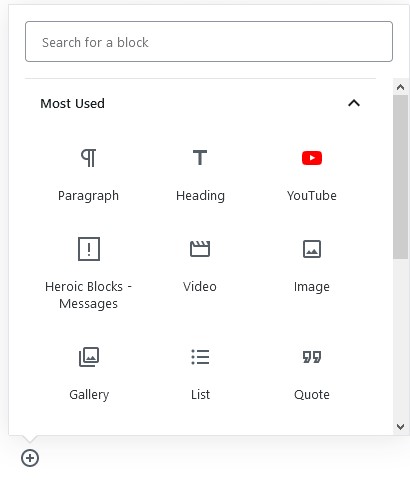 Adding widgets.
Let’s look at the Heroic Messages widget. This is effective for drawing quick information out into the open after a long section of copy. Highlight the general information you were trying to get across in that section.
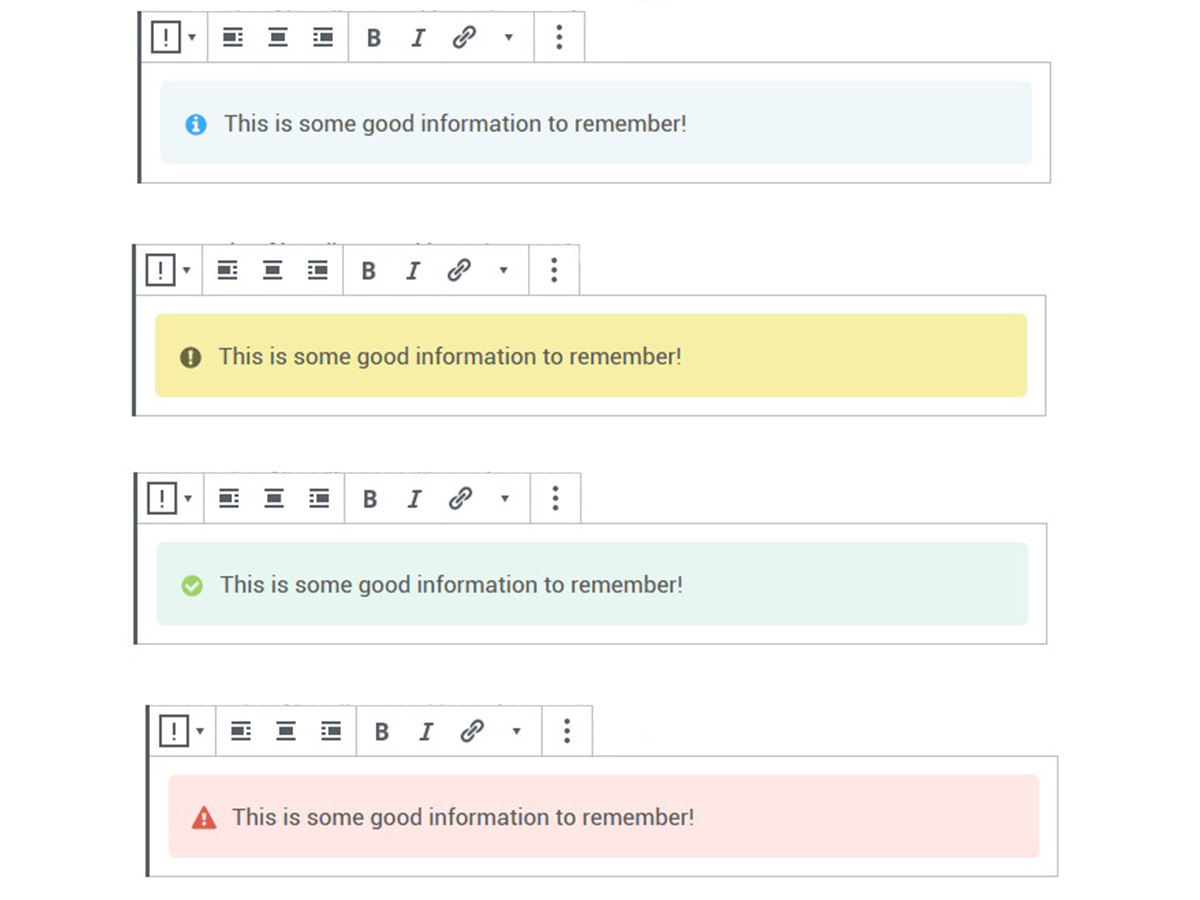 Examples of heroic block options.
Selecting the + button throughout the article or in the upper left corner will allow you to select a widget to add into your article. If you scroll down and choose the Heroic category you’ll find Heroic Messages. This widget will give you a highlighted box to add copy to. Clicking the top left option for this widget will let you choose the type of box you want.
